|
|
|
|


|
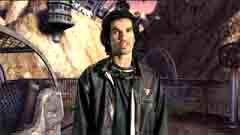
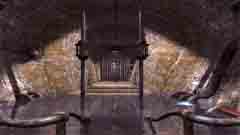
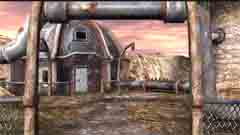
He disappears this time with an optical effect. Strange. SamTake the lift to the third floor and take the wagon to the Island Ship. Enter it and walk to the control-cabin.
6 - The Matia ZoneHannah and SamWhen Sam and Hannah are at the same place, anyone can do anything. Both has access to everything each of them has found out. You don't have to choose the same person I have done. HannahThe Scientist appears again
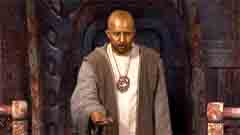
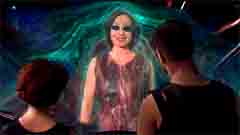
"... Thank God! You must help us ...
| |||||||||||||||||||||||||||||||||||||||||||||||||||||||||||||||||||||||||||||||||||||||||||||||||||||||||||
 Take the lift down. Walk up the ramp and take the chair-lift to leave the ship.
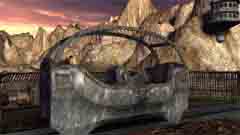
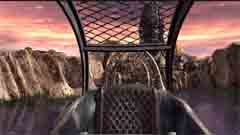
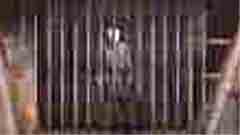
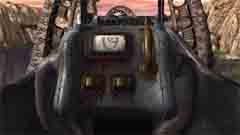
 The only thing to examine is the monorail wagon. Enter it and sit down.
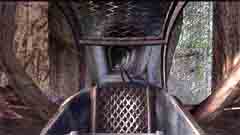
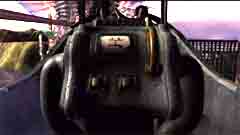
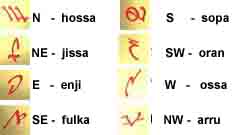
 If you enter the symbol shown on the right picture you travel through two tunnels towards a big black thing. Than it stops abruptly because the rail ends. There is a big gap. The wagon turns, then goes forward through the first tunnel and stops again.
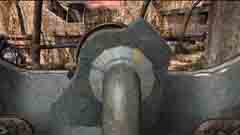
 Now you can leave the wagon.
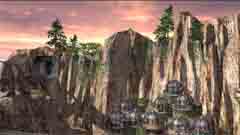
 Look right.
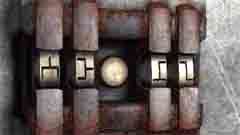
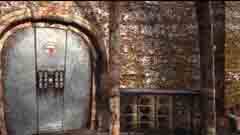
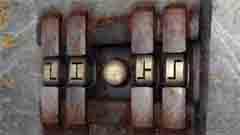
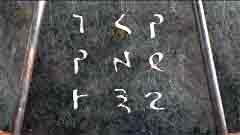
 Zoom in at the code-lock and look at the symbols. Make a sketch to remember them, you will need it later. The door is open. Click at it to enter and walk through the dark tunnel. You come to a pond. Far away you see a big black thing. A railway goes there but part of it is lowered.
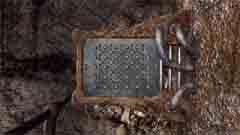
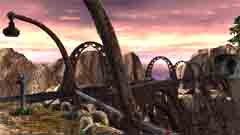
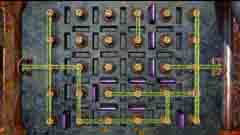 Walk right until you come to a puzzle.
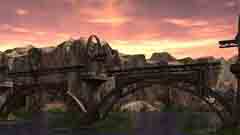
 Each time you beat the computer one of the missing bridges is raised. There are two bridges that have to be risen and it must be done by winning two games in suite. If you loose a gave after having raised a bridge it is lowered and you have to start all over again.
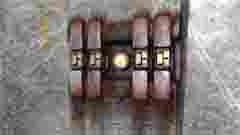
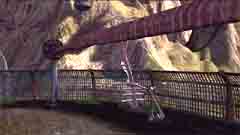
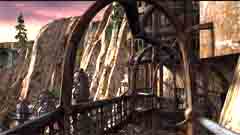 Walk through the tunnel and take the catwalk to the right.
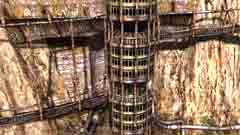
 Take a step forward and you'll see the lift coming up. There are evidently several floors. Click at the lever and push it down to the bottom and you are taken to the first floor,
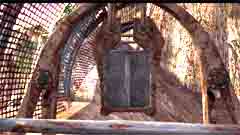
 Sam has been waiting in the fish-balloon.
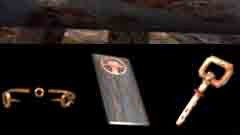
 Turn around and take two steps forward. Enter the tunnel.
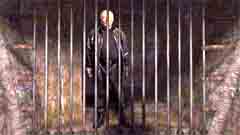
 The water has gone and you can walk to the prison-cell.
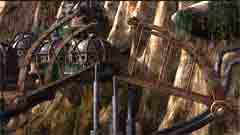
 Go outside and to the right.
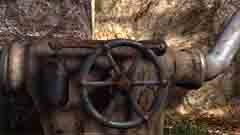
 Shift to Hannah.
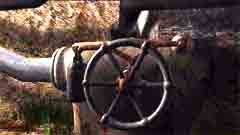
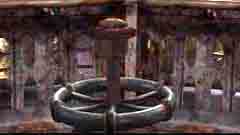
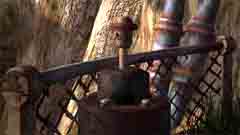
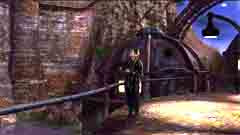
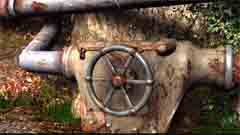
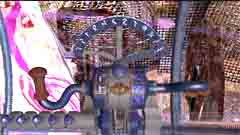
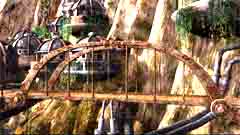 Hannah walks to the wheel to the left of the tunnel. Do exactly the same thing with this wheel. Hannah pulls the wheel clockwise one step and Sam pushes the button until both parts are level and the bridge stays down. (Look at the right picture.) Sam is still acting.
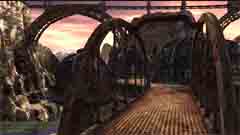
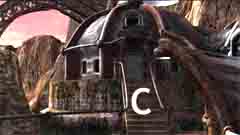
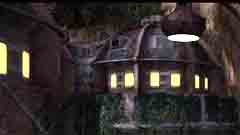
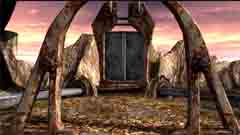
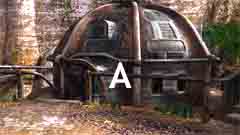 Pass the bridge. You come to a circular place with one house in the middle and four others around it. I have named the middle house X and the four others A, B, C and D clockwise starting from the bridge. Santo said enter twice exit once.
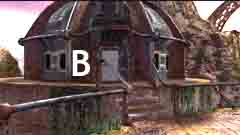
 Enter the different houses and see what happens. Sometimes you exit the same house where you entered, sometimes you exit a different house. A few times you exit the house named X. Learn to recognize the different houses, especially how it looks when you exit them.
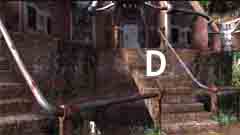
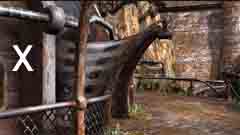 You must know which house you enter and which you exit to be able to make a plan how to enter each house twice and exit once. The middle house X is special. You can't enter it. Every time you enter it the game is reset.
 If you try you see a bright light and the door is closed. At the same time the game is reset.
Turn |
1
|
2
|
3
|
4
|
5
|
6
|
7
|
8
|
House entered |
House exited |
|||||||
A |
A |
C |
X |
C |
X |
A |
B |
D |
B |
X |
B |
X |
A |
D |
B |
A |
X |
C |
D |
A |
C |
D |
X |
B |
C |
A |
D |
B |
A |
B |
D |
C |
C |
D |
C |
Reset the game and enter house A, B, C, D in sequence. You always exit the same house. Look at the table. First time you entered house A and exited from A. Second time you entered B and exited from B. Same thin occurred with C and D the third and forth time. Look at the table. In the columns 1, 2, 3 and 4 you can see the same results. You can use the table to decide exactly where you exit any time in the sequence.
As mentioned before we have to exit house X exactly four times. In the table you see that we can exit house X in turns 1, 3, 5 and 8. In turns 2 and 8 there is only one choice B-X. That means we can never more enter house B. In turn 3 it is therefore only one possibility A-X. In turn 5 We have two different possibilities A-X and C-X
We can make a new table and enter the values we are going to use. We start with examining Alternative 1.
Turn |
Alt. 1 |
Comments |
|||
1 |
B-X |
B-X |
B-X |
B-X |
First turn is B-X |
2 |
C-A |
C-A |
D-A |
D-A |
We have already used all entries to house A and B. In turn 2 we can only choose to enter house C or house D. Look in column 2 in the first table. There are two values we can choose, C-A and D-A. |
3 |
A-X |
A-X |
A-X |
A-X |
Turn 3 is A-X. |
4 |
C-D |
D-D |
C-D |
D-D |
We can still only choose to enter C or D. |
5 |
A-X |
A-X |
A-X |
A-X |
Turn 5 is A-X. |
6 |
C-B |
Now we can decide the to remaining values we need to get two entries and one exit in each house. In the first case we need D-B and D-C. We look at columns 6 and 7 in the first table and find D-C but not D-B. This case is not working. The same thing occurs in case 2 and 3. But in case 4, where we both times must enter house C, we find the suitable values C-B and C-C. We have found a correct alternative. |
|||
7 |
C-C |
||||
8 |
B-X |
B-X |
B-X |
B-X |
Turn 8 is B-X. |
Reasoning the same way in alternative 2 where we have chosen C-X in turn 5 we can find three more correct alternatives. Can you find them?
But as we need only one we can use the one we have found so far.
First open the door to house X to reset the game. Then follow the pattern in the fifth column above.
As the last move open the door to house X, Now you can enter it.
A dimensional shift
 When you come out again everything has changed. It is night and light is coming from all windows. You have done a dimensional shift.
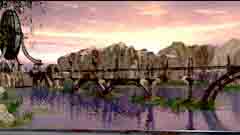
Walk towards the bridge. You turn automatically around and there is a woman looking at the sky.
She starts talking.
"I'm glad you came. Some of us, a few of us, have learned your language.
You are on the doorstep of our sanctuary.
The decision is yours: the Wanderer or the Good Servant. Which will it be?"
 She stops talking and looks again at the sky. Then she fades away.
What is so interesting up there in the sky. Walk to the spot where she stood and look up.
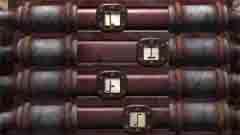
You see 12 lighted pipes some of them longer than the others. They look like the pipes on the computer-organ in Bosh Tunnel. Make a note of the ones that are higher, 1,, 5, 7, 8, 10, 12.
Enter house X. When you come out you have shifted back and it is daylight again.
Sam contacts Hannah who is still at the wheel and tells her everything.
All this talk about the Wanderer and the Good Servant. And they don't say he they say it. Is it in reality the big black thing or something inside it. And is the Wanderer and the Good Servant the same thing, Santo talked about opening it. Everything is very confusing but points to that you ought to find a way to get to the black thing.
The pipes with symbols

 Pass the bridge and walk through the tunnel. Turn left. There is a strange instrument. Zoom in on it. If you point at the top, the plaque in your inventory is highlighted, Click and it is attached to the instrument. You recognize the symbols from the code-lock on the open door. Enter the symbols from top to bottom so that they show the symbols on the code-lock from left to right.
There are five different positions on the instrument. Note down in which position the symbols are shown, 2, 5, 3, 4.
Shift to Hannah
Hannah
The Plaque from Bosh Tunnel
 Walk through the tunnel to the instrument. Click at the top to attach your plaque.
Move the frames to the positions they had on Sam's plaque.
Note down the symbols that are shown in the frames.
Shift to Sam.
Sam
The second railway puzzle
Enter Hannah's symbols in the code-lock. The door opens and you can enter. Walk to the left and you'll find a new railroad puzzle and remember that you have to beat the computer twice in row to raise both bridges. This time it is more difficult because the computer makes the starting move.
The only chance to win is to stop the computer from building his wall. But beware, he is devilishly skilled.
When you have beaten him twice you can see that both the bridges are risen. The way to the wanderer is open.
A railway journey
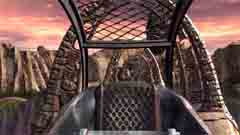
 Exit to the catwalk and go left to the monorail station. Click at the button on the pillar to call for the wagon. Enter the symbol that looks like a capital I, press the right button and enjoy your journey.
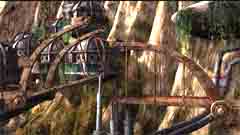
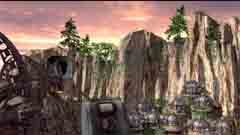
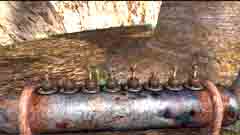
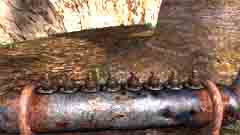 Exit the wagon to the left. Look around. There is a house to the left and to right of the road. Go to both and look around. Beside each house you'll find a pipe with 8 valves. It looks like the one you saw in the sky but that one had 12 valves.
 Enter the round place below the big black thing. There you find a similar arch with two plaques as in the fish-balloon. Enter and click at the left side of the arch. Your key is put into the lock.
Turn the key and the plaques will open.
 Three sets of balloon coordinates are shown.
Note them down.
Click at the key to close the plaques and take the key.
Turn around and press the button you find there.
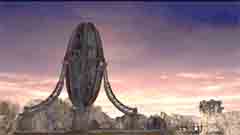
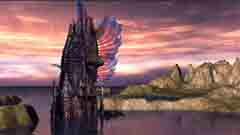
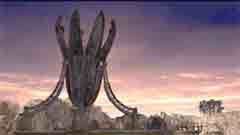
 You get a close-up of the Wanderer. It doesn't open. Something else has to be done.
Since you got new coordinates to the fish-balloon you are surely meant to use them.
Return to the monorail and press the button to call for the wagon.
 Enter the wagon and enter the symbol for the station at the catwalk..
Take the lift to the first floor.
Someone must return to Bosh tunnel and try to manipulate the computer-organ. But first it might be useful to talk to Santo. Hannah is still in the tunnel. If you pump the water away she can talk to him.
Go to the leftmost wheel and pull the lever to turn the wheel clockwise. Stay where you are.
Shift to Hannah.
Hannah
Talking to Santo
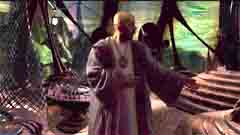
 When Sam has removed the water walk to the cell and speak to Santo. He says:
"If you are going to unlock the Wanderer, two operations are necessary back at Bosh: 'ossa' and 'jissa'. And don't forget to come back here."
A trip to Bosh Tunnel
 Take the lift to the third floor and take the catwalk to the monorail station. Push the button to call for the wagon. Enter the X-like symbol and you are taken to your ship.
Walk to the control-board and click at the second button to go to Bosh Tunnel.
 Leave the ship. Enter the tunnel and walk to the computer-organ. Look at the key-board. Do you recognize the symbols. Sam found them at the balloon-world. Santo mentioned ossa and jissa. You realize that you are meant to press those symbols but what shall you do with the12 valves. Sam saw 12 valves in the sky. Some of them were raised.
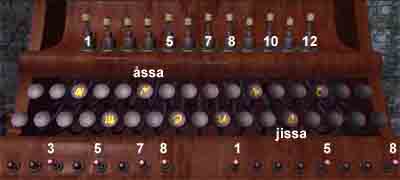 Pull up the valves 1, 5, 7, 8, 10 and 12.
First press the key with the symbol for ossa. It gets noisy and some small lamps are lighted.
Then press the key with the symbol for jissa. Same procedure is repeated.
Look at the small lamps at the bottom of the screen. There are 8 on each side. They must correspond to the 8 valves at each of the houses up at the Wanderer.
Return to the Island-Ship. Click at the third green button to return to the Matia Zone.
 Take the wagon and enter the symbol to go all the way to the Wanderer,
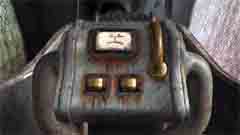
Go to the left house and pull up the valves 3, 5, 7, 8 as shown on the right picture. (Just like the small lamps to the left on the computer-organ.)
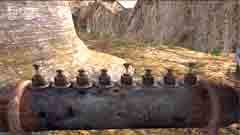
 Walk to the pipes near the right house. Pull up the valves 1, 5 and 8.
Then walk to the button below the Wanderer and push it. You'll see the Wanderer opening and closing.
 When you turn to leave, the woman Sam saw, appears again.
She says:
"So that's your decision. Well, so be it ...Take the wagon and return to the station at the catwalk. Take the lift to the first floor.
... there's still time to save your friends, but you must hurry. Get to the balloon and ...
...Matia will do what it must. Think well of us. And remember we tried to..."
Shift to Sam.
Sam
 Go to the forth floor and enter the fish-balloon. Enter the new coordinates and press the center-button.
The balloon takes off and flies to the Wanderer that opens. A hook on a wire is lowered and up comes a sphere-like thing.
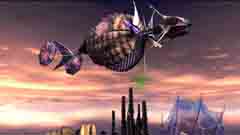 The balloon turns around, flies to the Living Ship and drops the sphere into the ship.
Green smoke is shown and the sails shrinks and vanishes. Then the balloon returns to its former mooring-place.
Exit the balloon and take the lift to the first floor.
Go to the leftmost wheel and pull it clockwise. Stay there.
Shift to Hannah.
Hannah and Sam
Hannah
Go to the grid. Santo comes. He says:""You did come back. You kept your word. Keeping faith is what matters.
Looking after one another. You and your friend.
You must stay together, do you understand? We can go now."
The Finish
 When both are together in the control-cabin the man from the houses appears again. He says something and points at the plant you saw the first time you entered the ship.
Now there lies a golden sun. Click at it.
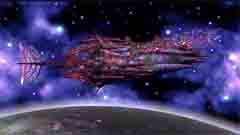
 The Island ship is up-rooted and becomes a spaceship returning to Earth,
There you meet the real Angela Davies who thanks all three of you for having saved the expedition, And she is looking at you all the time.
She also tells you that all the visions you saw of the crew, even of herself, were all Matianis trying to help you. Then she whishes good luck to all three of you, at your next mission and the game is over.


The story is written by MegaZina and based on the game Schizm - Mysterious Journey,
from L. K. Avalon. The pictures are taken from the game.
This homesite is private and has no connection with the named company.